Dec 1, 2009

Torte Reform


I couldn’t find anything on this fabulous cake, it’s history, and where it gets it’s name from, but that didn’t stop me from trying to make this delicious cake loaded with walnuts, and chocolate cream.

Torte Reform

For the layers:
10 egg whites
300g (10.14oz) fine sugar
300g (10.14oz)ground walnuts
2 tbsp flour

For the cream:
10 egg yolks
200g (6.76oz) sugar
100g (3.38oz) baking or dark chocolate,
(Chocolate can be increased/decreased to one’s own liking)
250g (8.45oz) unsalted butter or margarine,
3 tbsp very strong coffee (optional)

Beat egg whites, and sugar until firm, and then gradually add walnuts and flour. Divide this batter into 4-5 parts, and bake each in an 8 inch spring form pan in the preheated oven @ 355° F (180° C) for about 20 minutes.

To make the cream mix egg yolks with sugar and cook in a double boiler, mixing constantly. Add chocolate, and cook and mix some more until it starts to thicken.
Remove form the heat, and add the coffee. Let cool completely, and then mix in butter.
I recommend first making the cream, and set it in fridge to cool until you’re done with the layers. The cream is quite stiff, so to spread it over the layers, divide it in how ever many sections you’ll need to spread over each layer, and put the entire amount needed for one layer in the middle, then spread towards the edges.
This is a really delicious, rich, and satisfying torte!
Recipe adapted from Coolinarika.

Nov 19, 2009

Kugelhopf

Kugelhopf
Lately I have been trying hard to make time for my passion for baking, and I dusted off my cookbooks and found Baking: From My Home to Yours by Dorie Greenspan.
The book opened up on Kugelhopf, and I remembered I have been meaning to try it long ago.

From Wikipedia: "A Gugelhupf or Kugelhupf is a southern German, Austrian, Swiss and Alsatian term for a type of cake. As with the Jewish dish kugel, the name "Gugelhupf" is related to the Middle High German word Kugel meaning "ball" or "globe". In Hungary, Croatia, and Serbia, it is called kuglof, in the Czech Republic it is called bábovka, and in Poland it is called babka. In Republic of Macedonia the cake is known as "куглоф".

In the book, and in many other references it is spelled Kugelhopf, but to say the least, I'd say pronunciation is quite irrelevant, what's relevant is how delicious the cake is, and well loved across the globe.

So, here we are, it took a whole morning, and I was finished late in the afternoon. Simple recipe, just so many steps for the dough to properly rise, but oh so well worth it. I have followed the recipe religiously, and it was a major success. Kids couldn't wait to try it, and we are now down to just a few crumbs, just enough to accompany my morning coffee.

The crust is not hard at all, but rather crunchy in a soft way, really delicious. I would love to add a zest of orange next time, and perhaps soak the raisins in rum. Definitely a recipe I am sticking with, thank you Dorie!

Nov 12, 2009

Chocolate Cream Pie

Chocolate Cream pie
For upcoming Holidays, Martha Stewart has assembled a really nice magazine/publication "Holiday Sweets", and I got stuck on the page with this delicious Chocolate cream pie. I am so happy with the results, it's simple, elegant, and the cream is delicious. I am not normally a big fan of the meringue, but it just goes so well, and adds that magic touch.
The magazine is filled with beautiful creations, and I can't wait to try some more. It's very inspiring!
I had a little trouble with the lighting, so my pictures don't give it proper justice, you should see Martha's! Also, I have used regular wafers, and added melted chocolate to the crumb, the recipe calls for chocolate wafers, and they are much more dark, making the pie even better looking.


Oct 31, 2009

Happy Halloween!!!

Cauldron Cake

Just popping by to say Happy Halloween to all my food lovers! Boo!

Inside this Witch’s cauldron is a chocolate hazelnut cake with chocolate filling. I am not a big fan of food colors, so I used just a bit for the fire effect, and a tint of green for the whipped cream stew. Gummy eyes were a perfect addition.

It’s been at least 6 months since I have baked something, and since I had a time to, and the kids wanted something spooky for the occasion. Haven’t tried it yet, but cake baked excellent, and just as soon as I can, I will share the recipe.
Thank you again for visiting, and all your wonderful comments! :)


Chocolate hazelnut cake

For the batter:
5 eggs
100g (3.5 oz) baking chocolate, melted
2 tbsp all purpose flour
1 tbsp baking powder
100g (3.5 oz) butter, unsalted
100g (3.5 oz) sugar
100g (3.5 oz) finely ground hazelnuts
2 tbsp vanilla sugar

Separate yolks from whites. Mix yolks with sugar, and vanilla sugar un till nice and creamy. Add hazelnuts, melted chocolate, and flour mixed with baking powder. Mix butter until creamy, and add it to the batter.
Mix egg whites until nice and stiff, and fold those in, and incorporate well, but don’t over mix.
Separate batter into 3 portions, and bake 3 separate layers in a 8 inch spring form pan. I haven’t separated it at all, but baked one cake, and then cut it into three layers.

I have used a recipe for cake layers from Podravka, and their very popular cooking site (in Croatian), Coolinarika. I didn’t make the filling from the recipe because it asks for some things not available to me. You can use pretty much any filling you like.

I have used this one:
2 packages of Chocolate pudding mix
(Like Dr.Oetker, or if not available use 6 Tbsp of corn starch , 1 tsp vanilla extract)
0.7l (about 23 oz) of milk
6 Tbsp of sugar
2 ticks, 16 tbsp of unsalted butter or margarine
100g (3.5 oz) baking chocolate, melted (or half of that if you have chocolate pudding)

Take some milk from the 0.7 l, a bit less than half a cup, and mix in pudding mixes with sugar (or corn starch, and vanilla extract). Put the remainder of milk to boil over medium heat, and then add pudding mix, reduce heat a bit, and mix well and fast, so not to get lumps.
Cool down completely, I usually put it in a fridge a bit, and then freezer, to speed up the process. Do cover the bowl, so you don’t get the “skin” on your pudding. When cold it will be very firm, don’t get alarmed, it should be.
Now cream the butter sticks and mix it with the pudding, mixing on high speed. Add melted chocolate, and mix in well. Spread evenly over cake layers, and a little bit all over the outside of the cake. Now you can top it with some nice chocolate glaze, or decorate any way you like.

Mar 15, 2009

Tiramisu - Light as Air

Tiramisu

October 05, 2009:
Thank you so much for visiting, and your continued support, even in my absence!
I have taken on a career that requires a lot of work, and a lot of time, so I am still unable to return to the scene, and mix something up... I do, from time to time, check in to see what you all are doing, and I miss being part of your world actively.
Hope to return soon, at least on a monthly basis, till then, please enjoy Cafe Chocolada!
-Melita-

I have recently made this awesome light as air Tiramisu, based on a recipe from Masatera of “Recepti iz moje biljeznice” (Recipes from my notebook), and just slightly edited to what I had available here. It is not based on a traditionally used mascarpone cheese, but rather I have used Philadelphia whipped cream cheese, and got this luscious cream, which make you feel like you are eating sweet delicious air!

Tiramisu

2 packages of lady fingers, the soft kind
Strong coffee to soak them, but not over soak
1 pint of heavy whipping cream
1 packet whip it, whipped cream stabilizer
200g of Philadelphia whipped cream cheese
150g, or as much as you like, powdered sugar
1 teaspoon pure vanilla extract
About 3 tbsp cocoa powder

Mix whipped cream, with powdered sugar, and whipped cream stabilizer until whipped, then add cream cheese, vanilla extract, and mix well. You may also add like 1 or 2 drops of yellow food color, but that is completely optional.

On a plate, rectangular or however you like, arrange a layer of lady fingers soaked gently in strong coffee (unsweetened), then spread half of the cream, then a layer of lady fingers again, and then rest of the cream, and spread that cream all over the sides too, if you wish. Dust with cocoa powder, and you are all set. Refrigerate for couple of hours, or put in a freezer for about half an hour, to serve sooner :)

Mar 4, 2009

Spicy Pizza (or not)

Spicy Pizza
The pizza pictured here is not for sissies!!!! I love spicy, and this pizza packs an insult of great proportions! That’s how I like it, and I don’t need to worry about sharing! :)
However, you don’t have to make it spicy, and if you are in search of a really good pizza crust, then you are at the right place.

My family often enjoys Farida’s Tandir (Tandoori) Bread, and then we thought about using that bread dough as pizza dough (just take out few steps at the end, the egg wash, and seeds), and how successful are we? Well, everyone says I now make the best pizza in the world! I guess that summarizes it pretty well. Seriously, I don’t even give ordering pizza a thought any more. It is easy to make your own, it’s fun, and it doesn’t take long. Kids love making their own pizza!!!

From Farida’s recipe for Tandori Bread, I get 2 medium pizzas, 10” round pan. Also, you can easily make 3-4 personal sized pizzas, depending how big you make them.

Here is a recipe for one 10“ round pizza

Dough:
1 ½ cup flour, plus extra for kneading
¾ cup warm water
1 tsp dry yeast, fast rising is best
½ tsp salt

Other material:
Olive oil
Corn meal
Pizza sauce
Oregano
Cheese and toppings you like
I have used: Grated mozzarella, fresh mozzarella, extra spicy long peppers, crushed red hot pepper, cajun seasoning for crust, ham, bacon bits, onions, mushrooms, and when done I sprinkle with parmesan.

Mix yeast and water in a small bowl, until dissolved completely. Then gradually add it to flour mixed with salt. Make a dough, and then transfer on a floured work surface, and knead for about 5 minutes at least, until it’s nice and elastic. Collect the dough into a ball, and place in a glass bowl, cover tightly with plastic wrap, and leave let it rise until in a warm place until doubled, I usually leave it in a microwave (not turned on of course).

Then you punch the air out of the dough, and shape it into a ball, and stretch to the size of the baking pan. Grease the pan with olive oil, and sprinkle all over with corn meal. Shake it to get it all nice and evenly coated.

Set the oven to 400° F, it will be ready just in time you are done with making the pizza. Place the dough in the pan, and then press with your fingers towards the edges so you get a pizza that is a bit more thin with a little bit raised edges. If you like to season your edges with anything, like I do with cajun, first brush the edges with some olive oil, and then sprinkle with whatever you like. The rest is like any other pizza: pizza sauce, cheese, seasonings, toppings. Bake for about 15-20 minutes, or until done; also you can turn the broiler on for a minute or two for toppings to brown. Enjoy!

Pizza

I am sending this to Branka, this month’s host to Ajme koliko nas je , a food blog event created by Monsoon for food bloggers from ex YU territories. She chose this months main ingredient to be spicy peppers, and I might just go crazy on that one! :) Evo i recept na nasem!

Mar 3, 2009

Awards!!!


It’s been a while that I got these awards, and I actually made a post for them, but it got lost in a hungry browser incident, so I postponed, and finally I am back to it!
These awards remind us of appreciation we get from our foodie friends, and we forward them in same fashion. Thank you Navita for the lovely Lemonade Award, and thank you conunpocodizucchero for the sweet One Lovely Blog Award!!! : )

I don’t know if I am braking the rules, but I would like to forward both awards to the following food bloggers, which caught my eye with their delicious creations, and also some of my favorites, which I visit often, may not be in English but so worth the translation. My dear nominees, you can chose to accept both, or just one award which you like!
Nominees:
Amalia, My Culinary World, Recepti Iz Moje Biljeznice, Sweet Sensation, La Dalmatia Gourmande, Pan y Varios, Maya’s World, The Chef and The Photographer, Delicious For Kids, Cuina Banateana, and Via Delle Rose.

Rules for the Lemonade award:
Add the logo to your blog
Link to the person who awarded you
Nominate and link to 10 other blogs
Leave a message to your nominees

Rules for the One Lovely Blog Award:
Add the logo to your blog
Link to the person who awarded you
Nominate and link to 7 other blogs
Leave a message to your nominees

To all who may have already gotten the awards above, just take it as a nice though, and you don’t have to follow through : )

Lika Pie - Licka Pita

Lika Pie
This recipe was given to me long ago, during my refugee years spent in a refuge center in Kosovo. Life was not easy in a center like that, however, you sure can learn a lot about life, and appreciate it more forever when you have to rebuild it. Also, I have gained a great friend, who was a refugee from Lika, Croatia. I have lost contact with her, now that I am here in the States, but I cherish this recipe, as it is a great reminder of the good days we were able to make out of those tough times.

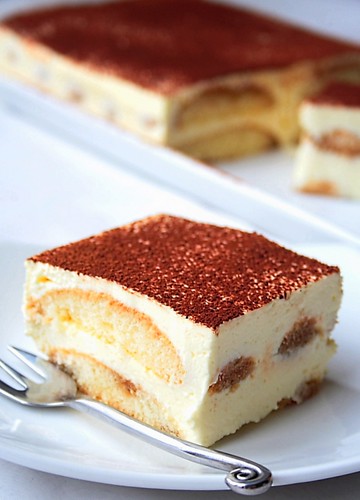
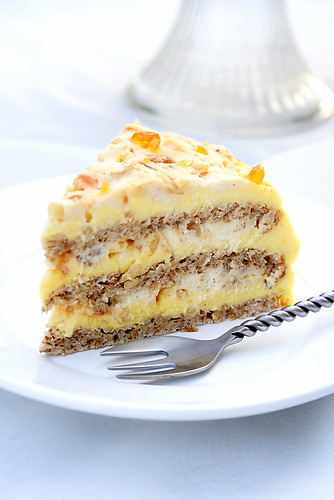
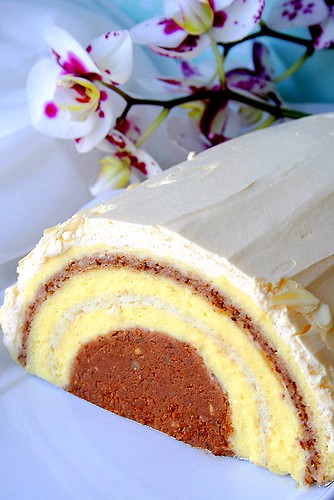
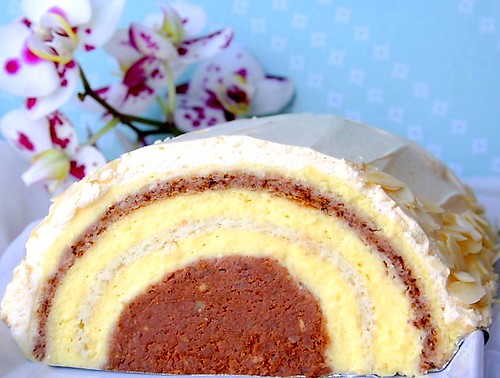
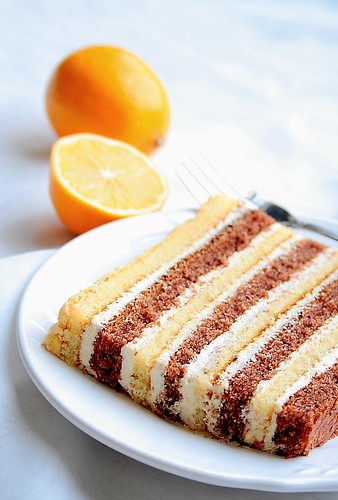
This is a traditional, old recipe from Lika. Simple sponge cake layers, with vanilla butter cream. I always add some citrus aroma to the sponges, which makes for a real nice touch.

Lika Pie - Licka Pita

You’ll need 3x this for three sponges:
3 eggs
7 tbsp sugar
100 ml oil
100 ml milk
8 tbsp flour
2 tsp baking powder
Couple of citrus fruit for sprinkling the sponges
1 tbsp cocoa, just for one of the sponges

For the filling:
500 ml/ 2 cups milk
9 scant tbsp flour
10 tbsp sugar
2 tsp vanilla sugar
250g unsalted butter or margarine
Some powdered sugar at the end if you want it sweeter

For the sponges, mix 3 egg yolks with sugar, then add egg whites which you have mixed until stiff.
Mix well, then add oil, milk, and flour mixed with baking powder. Do this three times, and add 1 tbsp cocoa powder into one of them, or two if you like two dark, and one yellow sponge.
Bake them in a parchment paper lined pan, or oiled and greased pan ( this is normally done in a square baking pan about 10x14 inches in size, but you can also make the cake round) at 395°F for about 15-20 minutes, or until toothpick comes out clean.

For the filling, heat milk a little, and take some of it to mix flour with it, and do so with a hand held mixer, by hand you‘ll get too many lumps. I also strain the mixture to avoid any lumps.
The remainder of milk, set to boil with sugar and vanilla sugar in it. When it reaches boiling point, remove from heat, and reduce heat to medium low, mix in flour mixture, and stir constantly. Place back on the stove, and cook for a few minutes, until it thickens. Careful not to burn it. Really doesn’t take long, plus as it cools it will thicken more. Cool, then chill in the fridge, and when completely cooled down, mix in the butter cut into thin slices. Do this in a mixer, I use a stand mixer.

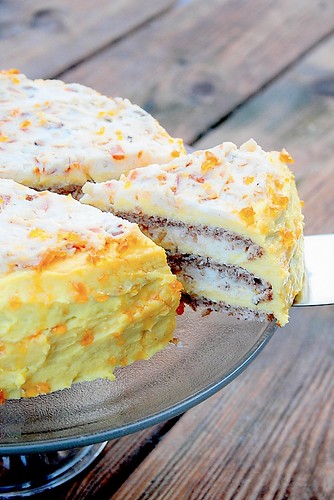
Assemble the cake by sprinkling each of the sponges with some citrus fruit juice (fresh, just squeeze straight from the fruit), like oranges lemons, Meyer lemons, and spread filling evenly in between, if you made two yellow sponges, then put the dark one in the middle, and vice versa.
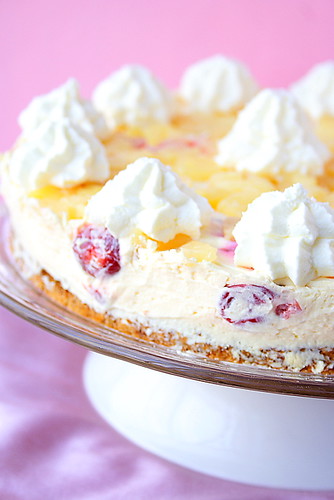
Decorate as you wish, the original recipe just calls for some filling on the outside, and some chopped nuts all over.

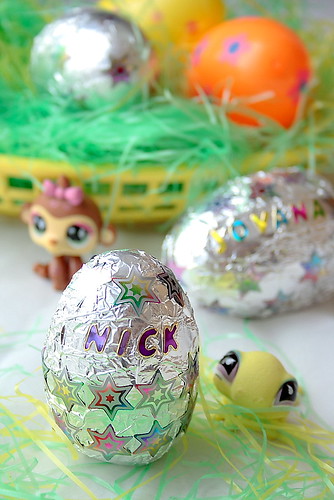
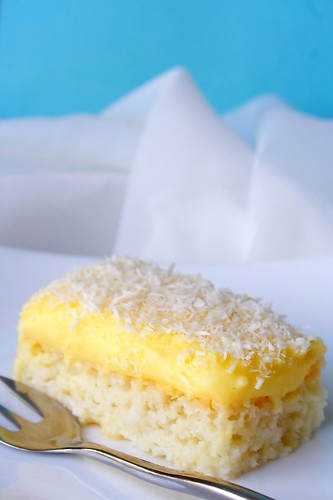
Now, what I did for the cake pictured: I used jelly roll pan, and made only 2 sponges, one yellow, and one brown. Then I cut each of the sponges into four, and voila, I got a small, but pretty tall cake. The rest is same, I used Meyer lemons to sprinkle each sponge. Then I decorated with inspiration I got from a Family Fun magazine, The Princess and the Pea Cake. I didn’t follow their instructions, just sort of played with what I had readily available at home. Not at all happy with the looks, but then again I am famous for my inability to decorate, and take on big projects like this!!! :))) Kids liked it, and I think I’ll try this one again. I won’t be using many colors though, as I really like to keep it simple.

Feb 28, 2009

Bacon Potato

Bacon potato

Now, this is how I want my potatoes from now on! Do you really need a recipe? All you do is peel whole potatoes, cut them all across, not too thin, and not all the way through, sprinkle with some salt, but not too much, the bacon is salty. Then fill with small bacon slices in between. Bake in a pan with some oil until potatoes are fully cooked, and serve!

In the original recipe, the potatoes are first cooked half way, and I guess this is done to cut the baking time, which I didn’t do, and they took a while to be completely baked, but I didn’t mind waiting.

Bacon potato Also, you can incorporate some cheese too, as well as let you imagination loose as to how you want to season them, among other options you chose. Please your taste buds, and keep them quiet!

Feb 27, 2009

Blueberry Crumb by HoneyB


Yet another rainy day, it started out warm though, I even turned my heating off (save a few dimes), and opened the door wide… Dropped the kids off to school, and then it was momma’s time! Sipping coffee, and reading HoneyB’s posts, always a good way to start a day! Her blog is filled with life, her personal stories, so heartfelt, and real, in addition to great recipes which she shares with all of us.

This morning before work she made this Blueberry Crumb Cake (wish I was her co-worker ), and I just wanted a slice right then and there, with my coffee. I read the recipe, and realized I had all the ingredients, even blueberries, no need to run to the store, just got up, and I made it.

The recipe is simple, just get everything prepared, and mix away. I was done in a flash, and it was baked just in time for my husband to try it before my highness did!!! He was back home from a pick up, walked in with a grin on his face, like :“Perfect timing!“, and then kept snatching away my photo subject. So, I just snapped couple of photos, before it was all gone. He ate like a third of the cake!!!


It is delicious, just look at those crumbs, and blueberries, which have that magic power to become more flavorful when baked. The whole house smelled just like a bakery, so we poured another cup of coffee, and enjoyed the warmth indoors, as the temperature dropped, and snow started frosting the grounds again!!! Thank you HoneyB! I had you in my kitchen today : ) Really enjoyed this cake! Again, you can find the recipe here.

Feb 26, 2009

Torte Egyptian

Torte Egyptian
It was a rainy day today, and luckily I made this cake last night, it can cheer the rainiest day! It is not so hard to make, and is worth every minute spent. One bite will make you feel so proud, it feels like you just got served at a fancy restaurant. Check out Marija’s blog, Palachinka, for recipe, and many more great recipes! She has also done this recipe as part of investigating of another great blog, Gaga's blog Iz moje kuhinje.

There is no guilty feeling, and hitting the treadmill later, I was too busy enjoying it to think about what it will do to my waistline. I just kept going back to the fridge to get just another “thin” slice : )

Love the crunch part, with praline, and toasted nuts, it gives such a character to the cake.
I have followed the recipe step by step, except I used whipping cream, because I had no powdered one. I guess that next time I will double the amount of whipping cream to get more of the crunchy filling, for this time I used ½ pint. Also, instead of my beloved hazelnuts, I have used a mixture of walnuts, and almonds.
Can’t say enough about it, my results were great, the recipe is easy, will definitely make this cake again!

What a delicious investigation, as part of February edition of a food blog event, FBI Rukavice, created by Maja of Cooks and Bakes in which we try out recipes from a chosen blog, and for this month we are investigating Palachinka. There is also an English version of the game available for all food bloggers, FBI Gloves.

Torte Egyptian

Feb 24, 2009

Homemade Kinder Surprise

Kinder Egg Surprise Kinder surprise egg was definitely my favorite treat when I was growing up, and I sometimes manage to buy them for my kids here in the USA, at my local ethnic food stores! There are other versions too. You can read more about it here, and here is the Canadian website for Kinder egg Surprise.

It’s a chocolate egg with shell made out of two thin layers of chocolate. One with regular milk chocolate, and another with white chocolate. Inside is a little plastic container, containing a toy.

I couldn’t take the picture of the making process (will add those for Easter), but it’s not so complicated. To make them, I bought some plastic eggs which can open, washed them, separated them in half, aligned each half with foil inside, and placed them onto an empty egg cartoon. I am sure there are special molds for this, but didn’t even want to go there, I live far from such stores :)

Then I coated the inside (of course) with chocolate. First with regular, the I put it in the freezer for about 20 minutes, then I carefully added a layer of white chocolate over the first layer. Back in the freezer, then simply got it out of the plastic shell, peeled the foil, and voila, I got chocolate egg halves. Sure, it’s not as smooth as store bought, but good enough for me, until I get hold of some molds.

Then I just placed the corresponding halves over a heated stove top for few seconds so I can seal the halves into a whole egg. Inside I placed my kids’ favorite little toys, The Littlest Pet Shop animals. Whatever fits, and it depends on what plastic egg you get. Back in the freezer for seal to harden.

After that I wrapped them with foil, and decorated with stickers. That is the beauty of making these, you get to use whatever chocolate you, or shall I say, your kids like, and you and them can decorate together, personalize with their names, or names of their friends and family.

I think it’s a great idea for Easter. It’s making a treat, and crafts all in one! Possibilities are endless. You can use just one kind of chocolate, and also you can fill it with whatever you want.
So, all you need is some plastic eggs, chocolate, and proper tempering, and for tempering the chocolate I have followed these directions.

Kinder SurpriseThis is my contribution to Sugar High Friday #52, a monthly food blogging event created by Jennifer, The Domestic Goddess, and hosted this month by lovely Marija @ Palachinka blog. She chose a theme copycat, and what a great idea that is!

Feb 23, 2009

Luscious Creme Brulee

Creme brulee
Life was but a shallow river before our rivers met
And our summer love gave birth to a timeless one
I shall love you more every new dawn, every sunset
I shall love you only more, never less, till I’m gone.

From my heart, to my husband, my best friend, and true love, who says I never say it enough :)
You are my creme brulee!

Luscious Crème Brulee

2 cups heavy (whipping) cream
1 cup half-and-half
6 large egg yolks
¾ cup sugar
Pinch of salt
2 teaspoons pure vanilla extract

Preheat oven to 300° F. Have ready a flame proof 1-quart shallow baking or gratin dish ( I have used smaller ramekins) and a roasting pan. Put on a kettle of water to boil for the water bath.
Heat the cream, and half-and-half in a medium saucepan over medium heat until hot. Remove from the heat.

Whisk together the yolks, ½ cup of the sugar, and the salt in a medium bowl. Slowly add the cream mixture, whisking constantly until blended and smooth. Do not over mix it. Add the vanilla. Pour the mixture through a fine strainer set over a medium glass measure or a bowl.

Pour the custard into the baking dish, and skim any foam from the top. Transfer to a roasting pan, place in the oven, and pour enough boiling water into the pan to reach halfway up the sides of the baking dish. Bake for 25-30 minutes, or until custard is set around the edges but still slightly jiggly in the center. Do not over bake--the custard will set further as it cools. Remove the baking dish from the water bath and let cool completely on a wire rack. Refrigerate the crème brulee, loosely covered, for at least 4 hours, until thoroughly chilled and set, or for up to 1 day.

Preheat the broiler. Have the roasting pan ready, and fill bowl with ice water. Gently blot the surface of the custard with the edge of a paper towel to remove any condensation. Sift the remaining ¼ cup sugar evenly over the custard. Place the baking dish in the roasting pan and carefully pour enough ice water to come halfway up the sides of the baking dish.
Creme Brulee
Broil custard about 3 inches from heat for 2-3 minutes, until sugar has melted and turned a dark amber color; carefully move or rotate the dish if necessary so the sugar caramelizes evenly. Remove from the broiler, and cool the custard in the ice water for 5 minutes.
Carefully remove the baking dish from the pan. Serve right away, or refrigirate, uncovered for no longer than 1 hour before serving-- or the topping will soften.

Recipe adapted from Luscious Creamy Dessertsby Lori Longbotham and France Ruffenach. I love this book, I have my eyes on many more recipes to try.
Poem by me :)

Feb 16, 2009

Roasted Tomato Soup with Grilled Cheese Croutons

Roasted tomato soup with grilled cheese croutons
I have jotted down this recipe from a Family Fun magazine, while waiting at the dentists office. I actually am not a big fan of tomato soups, but my husband is, and it sounded delicious for me too, with tomatoes being roasted, and it is! I love it! The recipe is actually from a cookbook 300 Sensational Soups, by Carla Snyder, and Meredith Deeds.

Roasted tomato soup with grilled cheese croutons

6 cups (3 pints) cherry tomatoes
3 tablespoons olive oil
1 teaspoon salt
1/2 teaspoon pepper
2 tablespoons unsalted butter
2 garlic cloves, minced
1 cup chopped onion
1 (28-ounce) can diced tomatoes
4 cups chicken broth
1/2 teaspoon thyme
1 cup whipping cream

Heat the oven to 400°. On a baking sheet, combine the cherry tomatoes, 2 tablespoons of the olive oil, and the salt and pepper. Toss the ingredients to coat evenly and spread them in a single layer. Roast the tomatoes until they are shriveled with brown spots, about 35 to 45 minutes.

In a large pot, heat the butter and the remaining tablespoon of oil over medium heat. Add the garlic and onion and sauté until softened, about 6 minutes. Add the canned tomatoes with their juice, the broth, the thyme, and the roasted tomatoes, including any liquid on the baking sheet. Bring the mixture to a boil, then reduce the heat and simmer, partially covered, for 40 minutes.

Using a food processor or blender, puree the soup until it's smooth. Return it to the pot and stir in the cream. Without letting the soup boil, warm it over medium heat, stirring often, until steaming. Add salt and pepper, if necessary.

Grilled cheese croutons:
1/4 cup unsalted butter, softened
1/4 teaspoon thyme
6 thin slices of bread
3 ounces Cheddar, thinly sliced

Heat a large skillet over medium-high heat. In a small bowl, combine the butter and thyme. Spread one side of each bread slice with the butter mixture. Place 3 slices in the pan, buttered side down. Top with the cheese, then with the remaining 3 bread slices, buttered side up. Cook, turning once, until toasted on both sides, 3 to 5 minutes per side. Remove the sandwiches from the pan. Let them cool slightly, then cut them into 1-inch squares. Makes about 60 croutons.

I am sending this to Aparna, who is this month's host for Food In Colors, a food blog event created by Harini (better known as the Sunshinemom) of Tongue Ticklers. This month's color is orange.

Banana Pudding

Banana pudding
Southern comfort food in all it’s glory, banana pudding served in jars, topped with meringue hats! Just delicious! Kids couldn't wait to get their hands on it!!!
I have discovered this recipe in a cookbook Screen Doors and Sweet Tea: Recipes and Tales from a Southern Cook. Definitely a great buy!

Banana pudding

Pudding:
3/4 cup sugar
1/3 cup cake flour
1/4 teaspoon salt
4 large egg yolks
2 cups whole milk
1/2 vanilla bean, split or 1/2 teaspoon vanilla extract
Freshly grated nutmeg
1/2 inch piece of cinnamon stick
Vanilla wafer cookies (good quality) or a tea cake recipe included in the book
4 medium bananas, peeled and sliced

Topping:
4 large egg whites
1/4 teaspoon cream of tartar
5 tablespoons sugar
1/2 teaspoon vanilla extract

Pudding: Bring 2 cups of water to boil in heavy bottomed saucepan over medium heat. In large stainless steel bowl, whisk together sugar, flour and salt. Whisk in egg yolks, followed by milk, vanilla bean, nutmeg and cinnamon. Place bowl over pan of water and cook, stirring until mixture is thick and coats the back of a spoon, 12-15 minutes. Remove from heat. Remove cinnamon and vanilla bean. Rinse vanilla bean and reserve for another use. If using vanilla extract, stir it in now.

While pudding is still warm, layer cookies, bananas and pudding in 1/2 pint canning jars or ramekins. Preheat oven to 425 degrees.
Topping: Whisk egg whites in electric mixer on medium speed until frothy. Add cream of tartar and slowly increase speed as egg whites become opaque. Add sugar 1 tablespoon at a time. Add vanilla extract. Whip until whites form a soft peak. Spoon meringue over warm puddings, sealing it to sides of jars.

Bake puddings for 4 minutes or until meringue is puffed and brown. Cool on rack for 20 minutes, then refrigerate for 2 hours before serving. Yield: 8 servings.
Banana Pudding

Feb 12, 2009

Tulumbe

Tulumbe
As part of February edition of a food blog event, FBI Rukavice ,created for food bloggers from formerly Yugoslavia (but open to others who speak the language) by Maja of Cooks and Bakes, we are investigating Palachinka. There is also an English version of the game available for all food bloggers, FBI Gloves, and coincidentally, for that event this month I am under investigation : )

If you don’t already know Marija, and her blog Palachinka then I am shocked!!!
She is an inspiration to so many, and my dear friend, whom I can’t wait to meet personally. Her blog is filled with such wonderful recipes, and amazing photography in which she seems to adopt her own personal style, as I can now easily distinguish her photos from others. She never seizes to astonish us with culinary creations from the Balkans, and countries from all over the world, and of course is a great presenter of her own country’s cuisine, Serbian cuisine.

I am probably her greatest fan, as I cannot imagine a day without satisfying my eyes with her wonderful presentations, I simply love her work, and she has helped me personally so much with tips on food photography, and blogging. Thank you Marija!

With so many recipes, it is hard to try just one, but for starters, I have tried one of my favorite sweets, Tulumbe. One of the favorite, and oldest desserts in the Balkans, and Marija’s recipe is special because they are not fried, as they traditionally are, but baked.
I have followed her recipe fully, and only step I skipped was caramelizing sugar, and that’s because when I saw how beautiful they are turning up to be in the oven, I have decided to go the faster route, and just make simple syrup, like she suggested, by boiling sugar, and vanilla sugar with water.

I must also admit that I couldn’t possibly wait for them to sit overnight, I wanted them ASAP, and they have soaked pretty fast since I have made them a bit smaller.
From now on I am never frying my tulumbe again, they are much puffier, and evenly baked in the oven as oppose to fried ones, and it’s also easier, and I didn’t sacrifice my hands to burns as much as when I fry them. Also, not to mention, saving the oil.
I didn’t have the proper piping tools, so the shape of my tulumbe is not exactly perfect, but that doesn’t change the great taste. Simply delightful!

Feb 8, 2009

Fritule

Fritule
Fritule (fritters) are doughnut-like Dalmatian treat with raisins, and since I was born, and grew up in Dalmatia they have a special place in my heart, and bring back fond memories. My kids prefer them to donuts, they put on a great disappearing act every time I make them.
Tons of recipes out there, but basic ingredients are the same. Instead of brandy, I use rum, just my preference.

Fritule

For the starter:
1 packet/ ¼ oz/ 7g yeast
1 tbsp flour
1 tsp sugar
About 4 tbsp warm milk
Mix it all in a cup, and let it rise for a while

For the dough:
400g/ 2 2/3 cup flour
1 tsp salt
5 tbsp sugar, or less
1 packet / ¼ oz/ 7 g vanilla sugar
2 eggs
2 Tbsp spiced rum, or brandy
1 tbsp lemon rind
1 cup warm milk
About a cup of golden raisins, soaked previously

Put all the ingredients in a bowl, except for milk, then add the starter, and start mixing, gradually adding milk, until it’s all well combined, and starts separating form the wooden spoon or hand, if you prefer mixing with a hand. Add raisins, and mix them in, you can add raisins after rising too. Let it rise in a warm place, until it doubles, or triples really, in bulk.

In a pan, heat oil, not too hot, like medium low, and maintain it that way. Spoon out spoonfuls of dough, and slide it off the spoon with your fingers. You can also dip the spoon into some oil (not hot, in a cup) to get more round fritule, but I don’t do this, I like the edges they get by not using the oiled spoon, that’s my favorite part of fritule : )

Fry them for few minutes on each side, until golden brown, turning them over with a fork. Allow them to drain for a while on a paper towel, and then dust with powdered sugar.

Russian fruit cake - refreshing

Russian Fruit Cake
This cake is simple to make, really refreshing, excellent to make ahead. I have been craving tart cherries like crazy lately. 10 years ago, I have craved dried apricots, and sometime later I got a baby girl... I think now, with snow melting away, I just felt like eating something which reminds me of warmer days!

Russian Fruit Cake Slice
Russian fruit cake

For the base:
4 egg whites
150 g sugar
100 g ground walnuts
1 tablespoon flour
1 tsp baking powder

Preheat oven to 360 F. Mix egg whites with sugar, then add flour with baking powder, and walnuts, and combine well. Transfer into a spring form pan (8inch) with base aligned with parchment paper. Bake for about 15-20 minutes. Cool, and transfer onto a cake plate; return the spring form ring around it.

For the filling:
500 ml heavy whipping cream
1 packet whipping cream stabilizer
1 packet/ 7g vanilla sugar
Powdered sugar to taste
250 g red tart cherries, fresh or frozen
250 g pineapple cut chopped up into small pieces, fresh or canned
Some whipped cream to decorate

Mix whipped cream with vanilla sugar, and powdered sugar, fold in cherries. Spread over cake base with spring form ring around it, then top with pineapple chunks. Chill well for few hours in a refrigerator, or about 30 minutes in a freezer. Decorate with whipped cream, and enjoy!

Credits: I have adapted this recipe, and adjusted it to my liking from "Kuhinjica"(Little kitchen), a Serbian cooking magazine.

Jan 27, 2009

Chocolate Cream Puffs

Everyone likes cream puffs, and for the first time I meet the chocolate version! I really liked this recipe, they were gone in a flash, and chocolate cream is just delightful! Vanilla cream is equally delicious, and looks awesome against dark puffs.

Chocolate cream puffs

For the choux pastry:
115g/4 oz/1 cup all purpose flour
2 tbsp cocoa powder
250 ml /8 oz/1 cup water
½ tsp salt
1 tbsp granulated sugar
115 g/4 oz/ ½ cup unsalted (sweet) butter
4 eggs

For the chocolate pastry cream:
450 ml/2 cups milk
6 egg yolks
115g/4 oz/½ cup granulated sugar
50g/2 oz/½ cup all purpose flour
150g/5oz plain semi-sweet chocolate, chopped into small pieces
115 ml/4 fl oz/ ½ cup whipping cream
I have added ½ tsp vanilla extract because I decided to make half vanilla, half chocolate

First, I make the pastry cream. Mix egg yolks with sugar. Add vanilla, if you will make vanilla cream. Set milk to boil, before it does, take some hot milk (like ½ cup) and add it in the egg yolk mixture, mixing it in fast. Add flour to the mixture, then stir it in the boiling milk. Mix for few minutes, remove from heat, and immediately add chocolate, and mix it well. If you like you can make half chocolate, half vanilla, then you need only half of the amount of chocolate. Let it cool down, later chill in the fridge, while making pastry. When cooled, add whipped whipping cream.

For the choux pastry, it’s same old procedure. Preheat oven to 425 F. Set water, butter, salt, and sugar to boil, then remove from heat, add flour mixed with cocoa powder, and mix well. Return to heat, and cook for another minute. Remove from heat again, and add one by one, 4 eggs, working fast with a hand mixer.
Transfer mixture into piping bag, and pipe puffs about 3 inches across (or what size you like), and 2 inches apart onto a large baking sheet lined with parchment paper. Baker for about 30-40 minutes, take them out, cut of about top third of each puff, and return them to the oven for another 5-10 minutes to dry them out. Cool, and fill with cream.

Drizzle tops with chocolate glaze. There is a recipe for one, but I didn’t like it, so just use any chocolate glaze you like, or like I prefer, just dust with some powdered sugar.

Recipe adapted from The Chocolate and Coffee Bible.

Jan 22, 2009

Raffaello slice

Raffaello slice
If you love Raffaello treats, then this is a cake for you! Desiccated coconut has much more flavor then regular shredded coconut, and it’s a winning combination with vanilla flavor. Easy to make too. I am thinking to incorporate almonds next time, like maybe add them in between layers or as a topping.

Raffaello slice

For the cake:
5 egg whites
250 g sugar
100 g sweetened desiccated coconut
100 g flour
2 tsp baking powder
1 cup milk to soak after baking

Mix egg whites with sugar until stiff, then add coconut, and flour with baking powder. Bake in a 9x13 inch pan for about 20 minutes on 350F, making sure it doesn’t brown too much, it should be just lightly golden. Cool it down slightly, and then evenly pour heated milk over it. Cool completely before putting the cream on.

Vanilla cream:
5 egg yolks
150 g sugar
2 tsp vanilla sugar
2 tbsp flour
3 tbsp corn starch
4 cups milk
250 g/ 18 tbsp unsalted butter or margarine

Mix egg yolks with sugar, then add some of the milk, flour, and vanilla sugar. Let remainder of the milk to boil, reduce heat, and then add the egg mixture, stirring constantly for few minutes until it thickens. Transfer into a mixing bowl, and cool completely. When cool, add butter or margarine cut into thin slices, and mix well.
Spread over cake, and decorate with either some shredded coconut, or whipped cream. Cut into squares or slices. Chill well before serving.

Recipe adapted from “Fat but Happy” magazine, Serbian edition of Macedonian food and wine publication.

Jan 21, 2009

Tunnel Cake

Tunnel cake
I wanted to make this cake for so long, and finally I did. It is a luscious dessert, fit for royalty, and I am not talking about it’s original look, but rich nutty taste with tons of cream!

Tunnel Cake

For the filling:
6 egg yolks
300 g sugar (I only used 150g, don’t like it too sweet)
2 powdered vanilla puddings + 6 tbsp of flour
(if no such pudding available then 6 tbsp of corn starch + 6 tbsp of flour+ 1 tsp vanilla extract)
1 liter/4 cups milk
250 g /18 tbsp unsalted butter or margarine

White cake layer:
6 egg whites
6 tbsp of sugar
6 tbsp of flour
1 tsp baking powder

Brown cake layer:
5 eggs
5 tbsp of sugar
100 g ground walnuts
2 tbsp plain bread crumbs

For the base/roll:
250g ground walnuts/walnut meal
150g ground biscuits/butter cookies
1 cup milk
4 oz semi-sweet baker’s chocolate
9 tbsp unsalted butter or margarine
9 tbsp powdered sugar

To decorate:
Whipped cream with stabilizer, nuts to make it look like rocks on the side
Also chocolate can be drizzled all over, just play with it

Prepare to make the cake in the order above, starting with the filling. Mix egg yolks with pudding and flour, or corn starch and flour, sugar, and some milk from the one liter. Let remainder of the milk boil, reduce heat, and mix in the pudding mixture, stirring constantly, and cooking for few minutes.
Let it cool completely, stirring it often so it doesn’t get skin on the top. Once cooled, mix in previously mixed butter or margarine. This will reduce clumps of butter/margarine, and you’ll have a smoother filling.

When the cream is cooling, you can start with cake layers. For both layers I have used a jelly roll pan, because there were no instructions, but I think 9x13 inch baking pan would do better.
For the white one, mix egg whites with sugar until stiff, then add flour with baking powder. Bake on medium heat, about 380 F, making sure it doesn’t brown. Didn’t track time, so just test with toothpick.

For brown cake layer, mix eggs with sugar until nice and smooth, then add walnuts, and bread crumbs. Bake at same temperature, also until toothpick comes out clean.
Now make the base, which will allow for tunnel look, because of it’s cylinder shape. Mix walnuts, cookie crumbs, butter, powdered sugar, adding milk gradually, because you might not need the whole cup.
Once you get a workable mass, add melted chocolate, and mix well. You do all this with hands.
Then make a cylinder shape out of the cookie/walnut mass on a long platter. Top it evenly with about half of the filling, place the white cake layer over it(cut the excess, if any), top with about another half of filling, then place the brown layer over it (cut excess, if any), remember to leave just enough filling to spread over the last/brown layer so whipped cream would hold better. Decorate, cool well, and enjoy!

Recipe source:
My aunt from Serbia sent me a “Fat and happy” magazine, originally Macedonian publication, formerly known as “Food and wine” (hope I got all that right; also printed in few other Balkan countries. Thank you auntie Ljubica!

Jan 15, 2009

Potato Pie with Leeks, and Feta Cheese

Potato pie with leeks and feta cheesePotato pie with leeks, and feta cheese

For the dough:
1 medium sized potato
1 cup flour
5 tbsp margarine, melted and cooled a bit
2 tsp baking powder
½ smaller leek, chopped up
½ tsp Salt
¼ tsp black pepper

For the filling:
5-6 medium sized potatoes
½ leek chopped up
½ cup sour cream
3 eggs
½ cup crumbled feta cheese, or cubed
Pinch of salt

First wash, and cook potatoes with their skin. Peel, and mash one immediately, and let the rest (for the filling) cool down.Preheat oven to 390 F. In a bowl with mashed potato, add margarine, flour, baking powder, salt, and pepper, and knead with hands to get a smooth dough. Add half of chopped up leek, knead it in, then transfer the dough to a medium sized spring form pan, spread it around to cover pan bottom with it.

Peel and slice the remaining potatoes, or chop them up, and place them on top of the dough, along with half of chopped up leek. Sprinkle with some salt (you be the judge as to how much), and pepper.

Mix eggs with sour cream, add a pinch of salt, and feta cheese. Pour this over the potatoes, and place the pie in the oven. Bake for about 40 minutes, depending on the oven. Cool a little, then remove the spring form, and serve. Best if eaten right away, as most potato dishes.


Recipe adapted from a special edition of a Serbian culinary magazine Carobni Lonac - Slane Torte(Magic pot -Savory cakes)
 
SITE DESIGN BY DESIGNER BLOGS